
SwiftUI’s navigation model underwent a major evolution with the introduction of NavigationStack in iOS 16.
Migrating from the old NavigationView / NavigationLink APIs to the new NavigationStack-based approach often requires significant code restructuring — but brings with it powerful new paradigms for managing navigation state.
With a recent navigation-related bug in my SwiftUI iOS app (Sound Doctrine Online), happening only on iOS 18+, I had to work quickly to deliver a fix. I saw this as a good opportunity to migrate to the newer navigation types introduced by Apple.
In this case study, we’ll walk through a real-world migration pull request, explaining every code change and the rationale behind it.
🔗 View the actual pull request here
Table of Contents
- Why Migrate?
- 1. Replacing NavigationView with NavigationStack
- 2. Tracking Navigation State with NavigationPath
- 3. Passing Path Bindings to Child Views
- 4. Migrating from NavigationLink(isActive:) to Value-based Navigation
- 5. Adding Hashable Conformance to Models
- 6. Introducing Value Types for Navigation Actions
- 7. Multiple Navigation Destinations in a Single Stack
- 8. Refactoring Previews
- 9. Programmatic Navigation
- 10. Other Minor Changes
- 11. Summary Table of Migration Steps
- Conclusion
Before we start however, here is why we should migrate in the first place.
Why Migrate?
- Better State Management: NavigationStack uses a NavigationPath to represent navigation state, making it easier to programmatically control navigation and restore state.
- Type Safety: You can push and pop strongly-typed data onto the navigation stack.
- Multiple Destinations: Easily handle multiple destination types in a single stack.
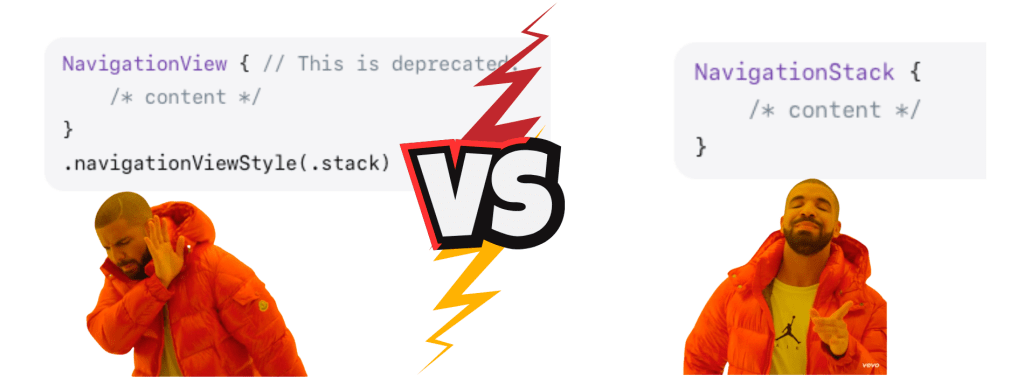
- NavigationView is Deprecated: With iOS 16, NavigationView is deprecated, being replaced by NavigationStack and NavigationSplitView (Apple Documentation).
1. Replacing NavigationView with NavigationStack
NavigationView was easy to use for simple hierarchies but limited in managing deeper or multi-path flows. With NavigationStack, you gain fine-grained control over the navigation flow by binding it to a NavigationPath. This allows the navigation state to be tracked and manipulated explicitly in your code — making features like deep linking, multi-tab coordination, and restoring app state much more manageable. Passing the path to child views also distributes control, letting each component participate in the navigation logic without global state hacks or workarounds.
Before
NavigationView {
    HomeTabView()
}
After
NavigationStack(path: $homeTabNavigationPath) {
    HomeTabView(path: $homeTabNavigationPath)
}
What Changed?
- NavigationView → NavigationStack:
NavigationStackreplacesNavigationViewas the primary container for navigation. - Path Binding: We introduce a
NavigationPathbinding (e.g.,$homeTabNavigationPath) to manage the navigation state programmatically. - Passing Path Down: The navigation path is passed as a binding to the child view, allowing it to manipulate navigation (e.g., push/pop) directly.
Why?
NavigationStackoffers programmatic control of the navigation stack via the path. This enables advanced navigation scenarios, deep linking, and state restoration.- It aligns with SwiftUI’s new data-driven navigation model.
2. Tracking Navigation State with NavigationPath
Before
No explicit path state tracking.
After
@State private var homeTabNavigationPath = NavigationPath()
@State private var searchTabNavigationPath = NavigationPath()
// ...etc for each tab
What Changed?
- We declare a
@Statevariable for each tab’s navigation path. - Each tab’s
NavigationStackuses its own distinct path.
Why?
- This enables each tab to maintain its own navigation history, matching the expected behavior in multi-tab apps.
- You can programmatically reset or manipulate the stack for each tab independently.
3. Passing Path Bindings to Child Views
Before
Child views managed navigation via NavigationLink(isActive:) or similar, with local state.
After
Swift
HomeTabView(path: $homeTabNavigationPath)
// and inside HomeTabView:
@Binding var path: NavigationPath
What Changed?
- The navigation path is threaded as a binding down through each view that needs to control navigation.
Why?
- This allows child views to push/pop destinations on the stack directly, using a single source of truth for navigation state.
4. Migrating from NavigationLink(isActive:) to Value-based Navigation
Before
NavigationLink(
    destination: VideoDetailView(videoId: video.videoId, channelId: video.channelId),
    isActive: $showVideoDetail
)
After
NavigationLink(value: video) {
    // label
}
.navigationDestination(for: Video.self) { video in
    VideoDetailView(videoId: video.videoId, channelId: video.channelId, path: $path)
}
What Changed?
- From isActive to Value-based Navigation: Instead of toggling a Boolean to push a view, we now append a value to the navigation stack.
Type-safe Destinations: Using.navigationDestination(for: Type.self), we declare how to map types to views.
Passing Path: The destination view receives the navigation path binding to allow for further navigation.
Why?
- The new approach is type-safe, decouples navigation triggers from state, and supports programmatic navigation and deep linking.
- It eliminates navigation bugs caused by mismatched Boolean state.
5. Adding Hashable Conformance to Models
Before
Data models did not conform to Hashable.
After
struct ChannelData: Hashable { ... }
struct HomeVideo: Identifiable, ThumbnailableVideo, Hashable { ... }
enum VideoType: String, Equatable, Hashable { ... }
What Changed?
- All types used for navigation destinations (and path values) must conform to
Hashable.
Why?
NavigationStackrequires all path elements to be aHashableso that SwiftUI can uniquely identify and track each navigation item.
6. Introducing Value Types for Navigation Actions
Before
Navigation was managed via Boolean state variables.
After
var onChannelSelected: (ChannelData) -> Void
...
onChannelSelected: { channel in
    path.append(channel)
}
What Changed?
- Instead of toggling a Boolean to show detail, we append a ChannelData to the navigation path.
- We define closures (such as onChannelSelected) to encapsulate navigation actions.
Why?
- This makes navigation explicit, type-safe, and testable.
- It’s now possible to push any data type onto the stack, and SwiftUI will render the correct destination.
7. Multiple Navigation Destinations in a Single Stack
After
.navigationDestination(for: ChannelData.self) { channel in ... }
.navigationDestination(for: Video.self) { video in ... }
.navigationDestination(for: SearchQueryData.self) { query in ... }
What Changed?
- You can now declare multiple destination handlers for different types.
- Each type can have its own custom view.
Why?
- This enables complex navigation flows, such as going from a search result to a video detail, to a channel all within a single navigation stack.
8. Refactoring Previews
Before
HomeTabView()
After
HomeTabView(path: Binding.constant(NavigationPath()))
What Changed?
- Previews now provide a constant navigation path binding.
Why?
- Because views now require a binding to the navigation path, previews must supply one as well.
9. Programmatic Navigation
Before
Navigation was triggered via local state toggles and sometimes felt cumbersome for complex flows.
After
path.append(SearchQueryData(itemType: .sermons, searchText: searchText, language: .init(...)))
What Changed?
- Navigation is now triggered by appending a value to the stack, which triggers the corresponding destination.
Why?
- This allows for much more flexible and powerful navigation, including programmatic deep linking and animated transitions.
10. Other Minor Changes
- Removed Redundant State: State variables used solely for managing navigation (
showDetail,selectedId, etc.) are no longer needed. - Consistency: All navigation now flows through the stack, whether triggered by tile buttons, search bar, or list rows.
11. Summary Table of Migration Steps
| What Changed | Why It Matters |
|---|---|
NavigationView → NavigationStack | Enables modern, data-driven navigation |
Introduced NavigationPath per tab | Allows independent navigation stacks in a multi-tab app |
Path passed as @Binding to views | Makes navigation state accessible throughout the view hierarchy |
All navigable models are Hashable | Required for value-based navigation destinations |
Value-based NavigationLink | Type-safe, flexible, and supports deep linking |
.navigationDestination(for:)used | Declares how to render each type in the navigation path |
| Removed Boolean navigation state | Prevents sync bugs, simplifies logic |
| Updated previews with path bindings | Keeps previews compatible |
Conclusion
Migrating to NavigationStack is more than a syntactic change: it’s a shift to a more powerful, data-driven navigation model. This case study demonstrates how to adapt a real-world, multi-tab SwiftUI app, surfacing the benefits of type-safe, programmatic navigation and a more maintainable codebase.
If you found this useful or would like more such mobile app development related blog posts, hit the like and follow button.
How do you use navigation in your iOS app? Drop a comment below. Thank you for your attention. Bis bald!

Leave a comment